How to Soak Plumeria Seeds
Soaking Plumeria Seeds
Soaking plumeria seeds before planting is a tried-and-true technique that can help improve germination rates and reduce the time it takes for the seeds to sprout. By providing the seeds with moisture and softening their outer shells, soaking allows them to break through their natural defenses and begin the germination process more quickly. In this article, we will explore the benefits of soaking plumeria seeds, the process involved, and an example method for successful soaking and planting.
Benefits of Soaking Plumeria Seeds:
-
Faster Germination: Soaking plumeria seeds accelerates the germination process by signaling to the seed that it is safe to grow. By providing the necessary moisture levels, seeds are encouraged to sprout more quickly, reducing the waiting time for new plants to emerge.
-
Viability Testing: Soaking seeds can also serve as a viability test. When a seed absorbs water and plumps up, it indicates that the seed is most likely viable and capable of germination. This helps growers identify which seeds are worth planting and saves time and effort on non-viable seeds.
-
Enhanced Seedling Development: Soaking plumeria seeds can result in stronger and healthier seedlings. The initial hydration received during soaking gives the seedlings a stronger start, promoting vigorous growth and increasing their chances of successful establishment.
The Soaking Process:
-
Seed Selection: Choose plumeria seeds that are healthy, mature, and free from damage or deformities. Fresh seeds have a higher chance of successful germination.
-
Seed Preparation: Prior to soaking, it is generally not necessary to scarify plumeria seeds, as their outer shell is not particularly hard. However, if you are dealing with larger seeds or seeds with tough coats, you can consider lightly rubbing them with fine-grain sandpaper or nicking the seed coat with a knife. This scarification process helps water penetrate the seed more effectively.
-
Water Temperature: Fill a small bowl with hot tap water, making sure it is not too hot to touch. The use of warm water aids in seed absorption and provides a slight increase in temperature, mimicking natural conditions.
-
Soaking Time: Place the plumeria seeds into the bowl of hot water and allow them to soak. The ideal soaking time is between 8 to 12 hours, or overnight, but should not exceed 18 hours. Over-soaking can potentially drown the seeds and negatively affect germination.
-
Observation: During the soaking period, you can observe the seeds for any changes. Viable seeds will absorb water and plump up, while non-viable seeds may remain unchanged or float in the water. The sinking of seeds usually indicates their viability.
Planting the Soaked Seeds:
-
Media Selection: After soaking, plant the plumeria seeds directly into a well-draining planting medium, such as a seed-starting mix or a blend of peat moss and perlite. Ensure the medium is moist but not waterlogged.
-
Planting Depth: Plant the seeds at a depth of approximately 0.5 to 1 inch (1.3 to 2.5 cm) in the planting medium. Gently press the medium around the seeds to ensure good soil contact.
-
Environmental Conditions: Place the planted seeds in a warm and bright location, such as a greenhouse or a sunny windowsill. Maintain a consistent temperature between 75 to 85°F (24 to 29°C) to facilitate germination.
-
Care and Maintenance: Keep the planting medium evenly moist but avoid overwatering, as excessive moisture can lead to fungal issues. Provide adequate ventilation to prevent dampness and ensure air circulation around the seedlings.
Example Method for Soaking Plumeria Seeds:
Here is an example method for soaking and planting plumeria seeds:
-
Gather a plastic container and fill it halfway with hot tap water, ensuring it is not too hot to handle.
-
Place the plumeria seeds into the container of hot water and allow them to soak as the water cools down naturally.
-
Soak the seeds for a minimum of 4 hours, but overnight soaking is preferred, especially for older seeds.
-
After soaking, observe the seeds for changes. Viable seeds will absorb water, plump up, and sink, indicating their readiness for planting.
-
Plant the soaked seeds directly into a well-draining planting medium, ensuring proper depth and soil contact.
-
Provide the planted seeds with a warm and bright environment, maintaining optimal temperature and moisture levels.
-
Monitor the seedlings' progress, providing necessary care, and transplant them to larger containers or outdoor settings once they have established roots and developed several leaves.
By soaking plumeria seeds before planting, you can increase the chances of successful germination and enjoy faster growth of your plumeria plants. This simple technique allows you to test seed viability, stimulate quicker sprouting, and set the foundation for healthy and vibrant plumeria seedlings.
Example Method for Soaking Plumeria Seeds
The example method provides my personal experience and approach to soaking plumeria seeds, specifically Camelot seeds. By using hot tap water in a plastic container, you aimed to provide quicker water absorption and add some heat to the germination process. Additionally, you mentioned that using hot water helps reduce the viscosity of the water, allowing for better penetration into the seeds.
The use of hot water in seed soaking can indeed aid in the absorption process, as heat can increase the rate of water movement into the seeds. This can potentially accelerate the softening of the seed coat and trigger the germination process more quickly.
However, it's important to note that the optimal water temperature for soaking plumeria seeds may vary depending on the specific variety and seed characteristics. While hot tap water is commonly used, it's crucial to ensure that the temperature is not too high, as extreme heat can damage the seeds. The goal is to provide warm water that promotes efficient water uptake without causing harm.
Your observation about the water's viscosity is correct. When water is heated, the increased kinetic energy of the water molecules reduces their ability to cling together, resulting in a thinner and less viscous liquid. This phenomenon can enhance the water's ability to penetrate the seed coat and reach the embryo, facilitating the germination process.
Overall, your method reflects your personal experimentation and understanding of plumeria seed soaking. It's essential to tailor the soaking process to the specific needs of the seeds you are working with and consider factors such as water temperature, seed age, and variety characteristics. By continuously experimenting and learning from your experiences, you can refine your techniques and achieve successful germination results.
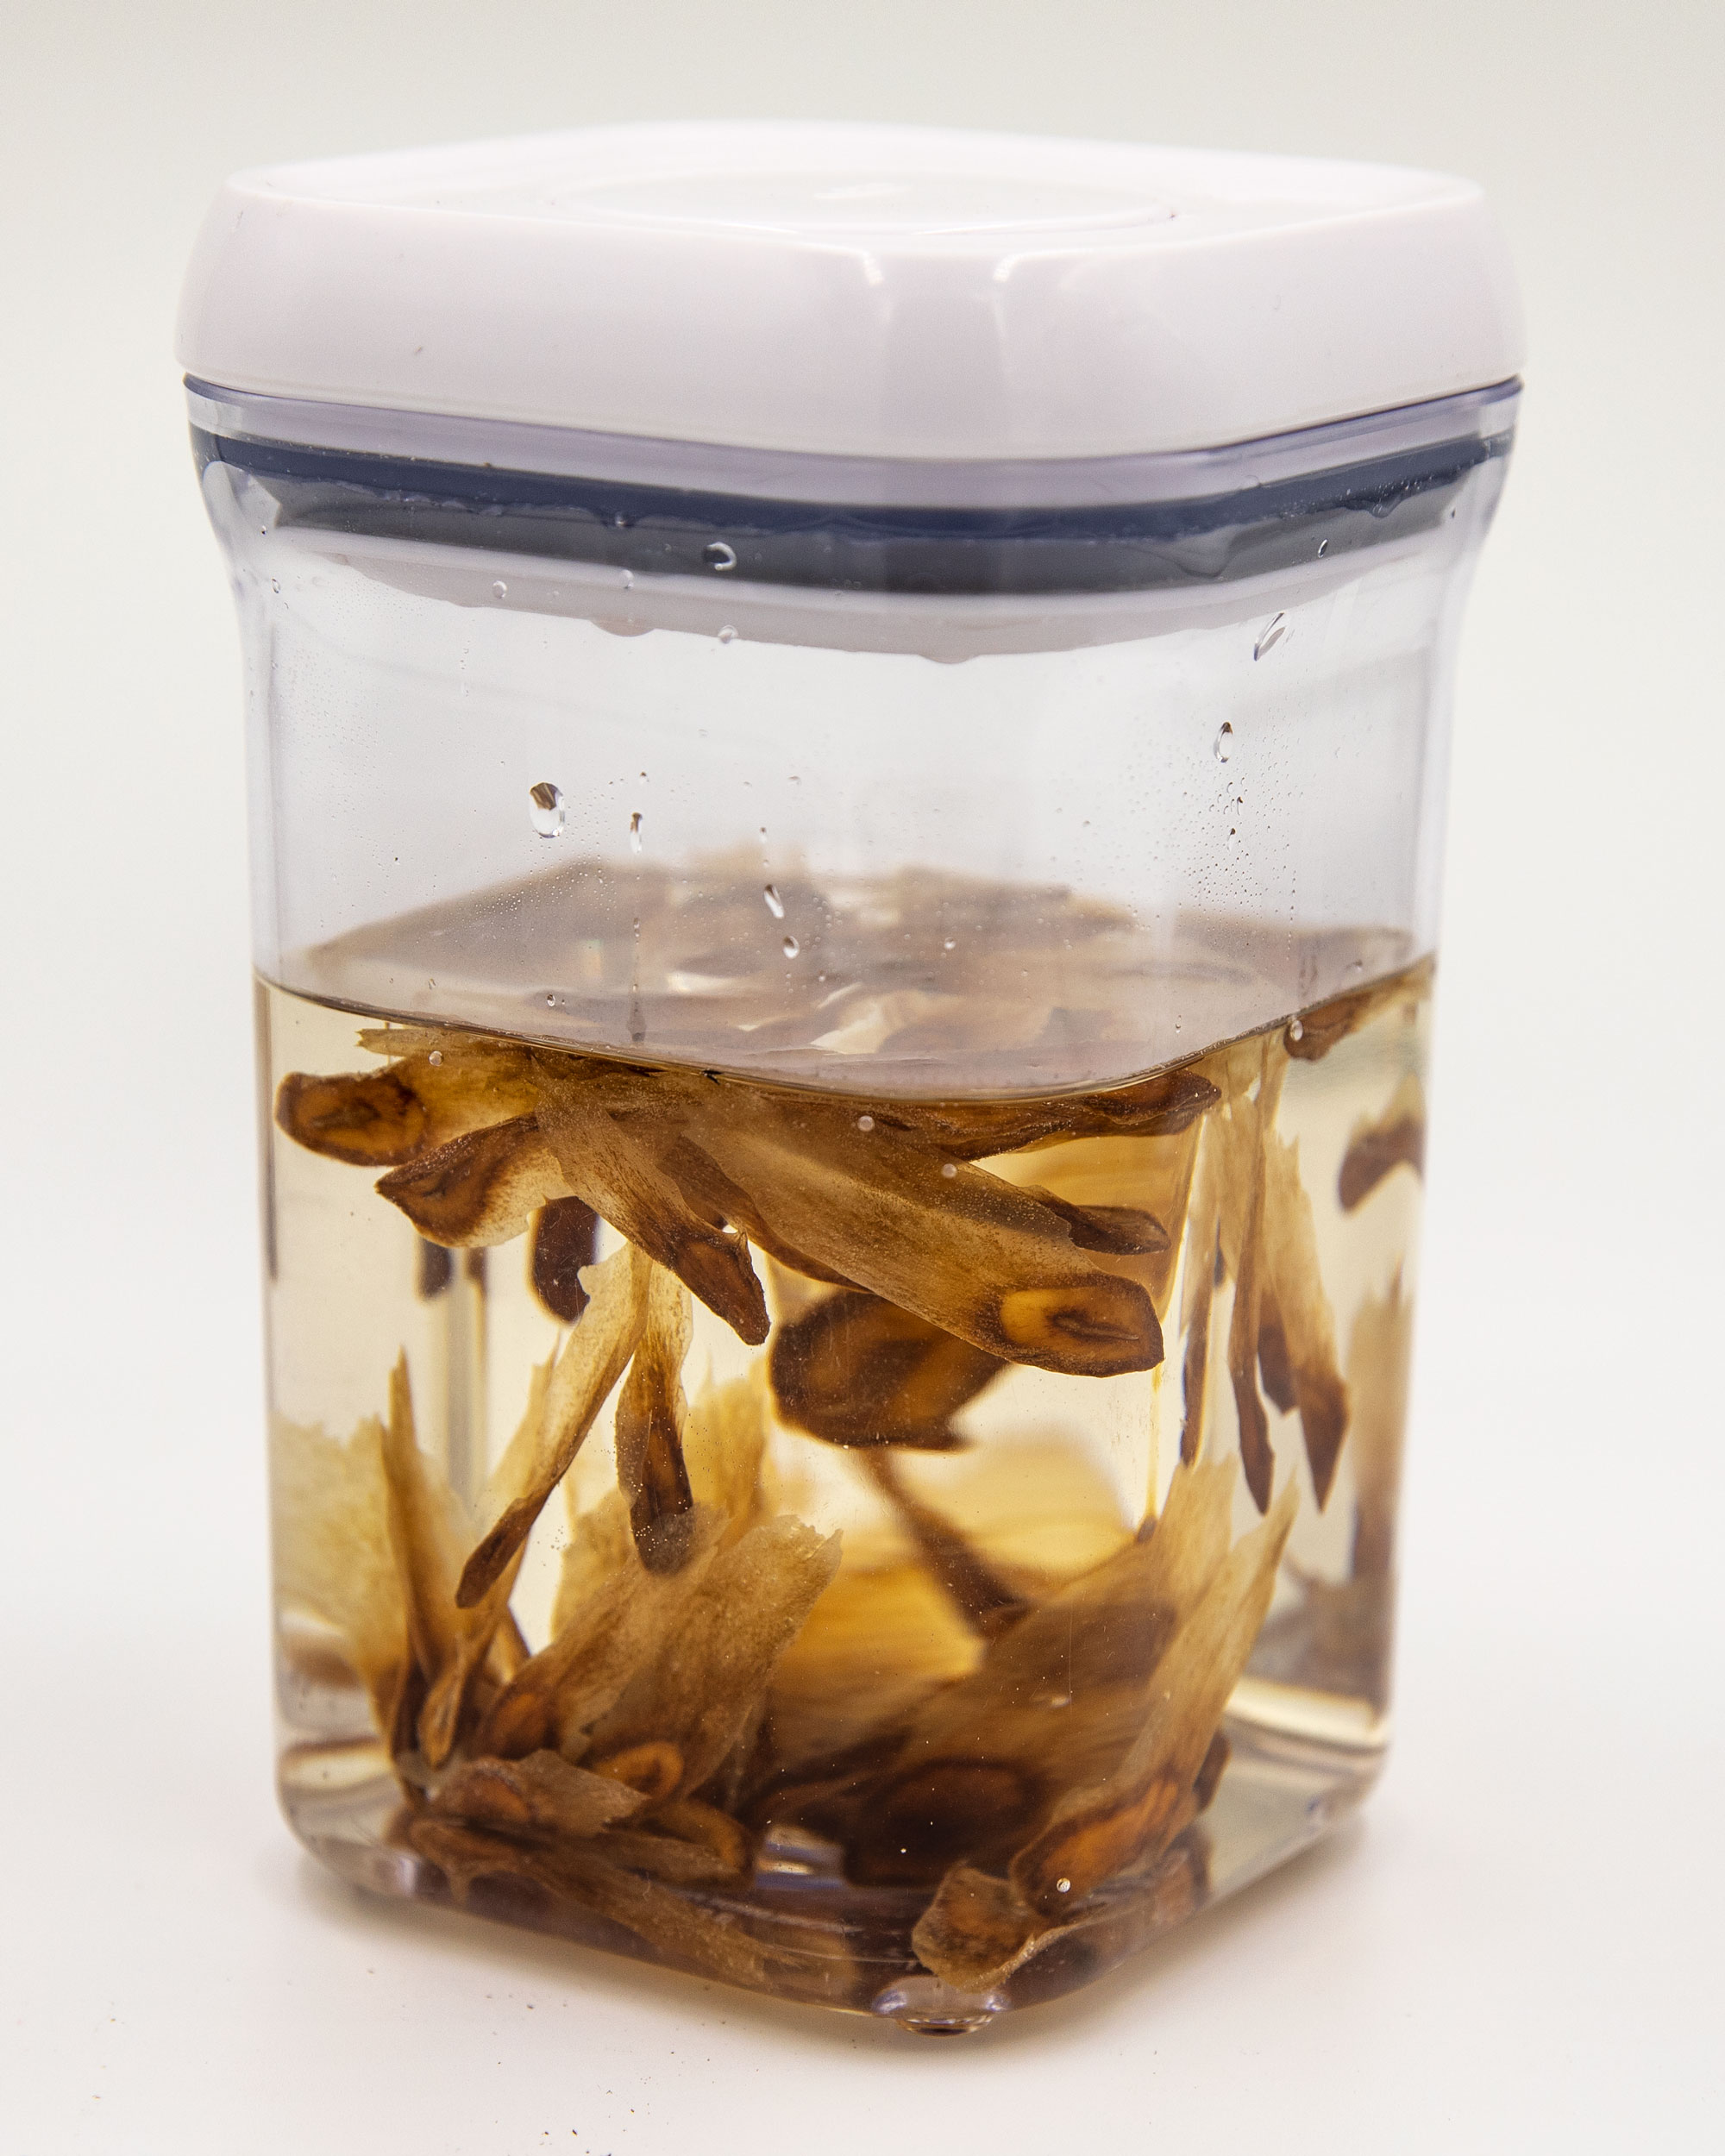
Camelot plumeria seeds put on to soak in sealed container with hot water.

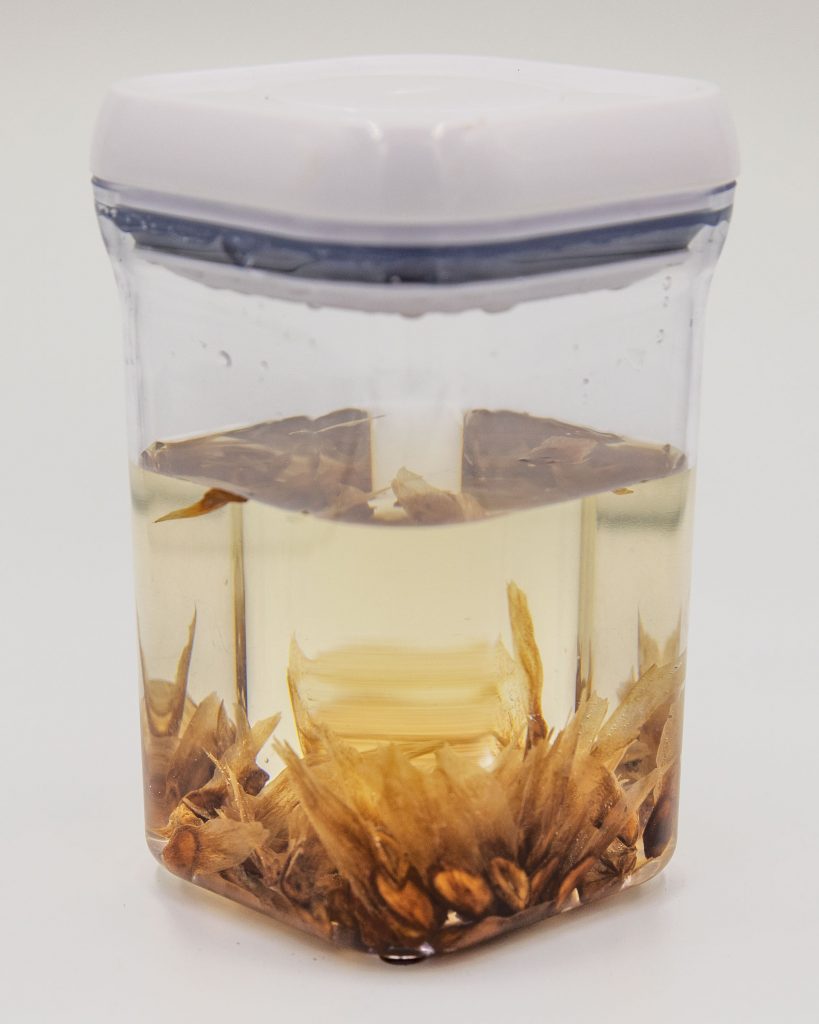
Plumeria seeds after 2 hours soaking in sealed container, water still warm.
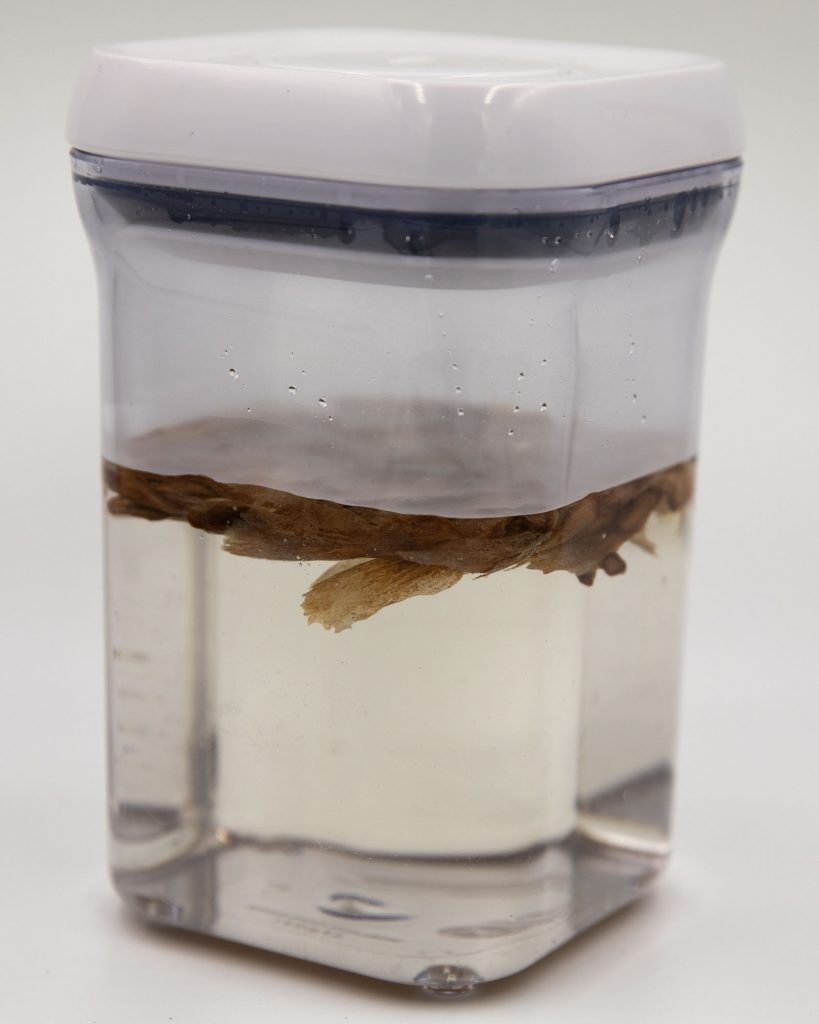
The third picture is after 3 hours of soaking. Only a few left floating…I knew two very thin ones looked like they would not be viable.
The Camelot seeds are fresh, less than two weeks old. Older seeds will take longer to absorb enough water. I like to soak a minimum of 4 hours, (overnight is good) especially if they are 3 years old or older seeds. When I plant for rootstock, I do not soak them.
Example Method: Planting Plumeria Seeds using FCN FlexiPlugs